Building a Ukulele From Scratch
I built a ukulele from scratch using basic woodworking tools.
Material Selection
Choosing the wood was an important first step since it affects both the sound and durability of the instrument. I chose oak for the body—a hardwood known for producing a bright tone, and black walnut for the fretboard to provide a dark contrast against the lighter oak.
Choosing the right wood was about more than aesthetics—it was crucial for balancing durability with the tonal qualities I wanted in the final instrument.
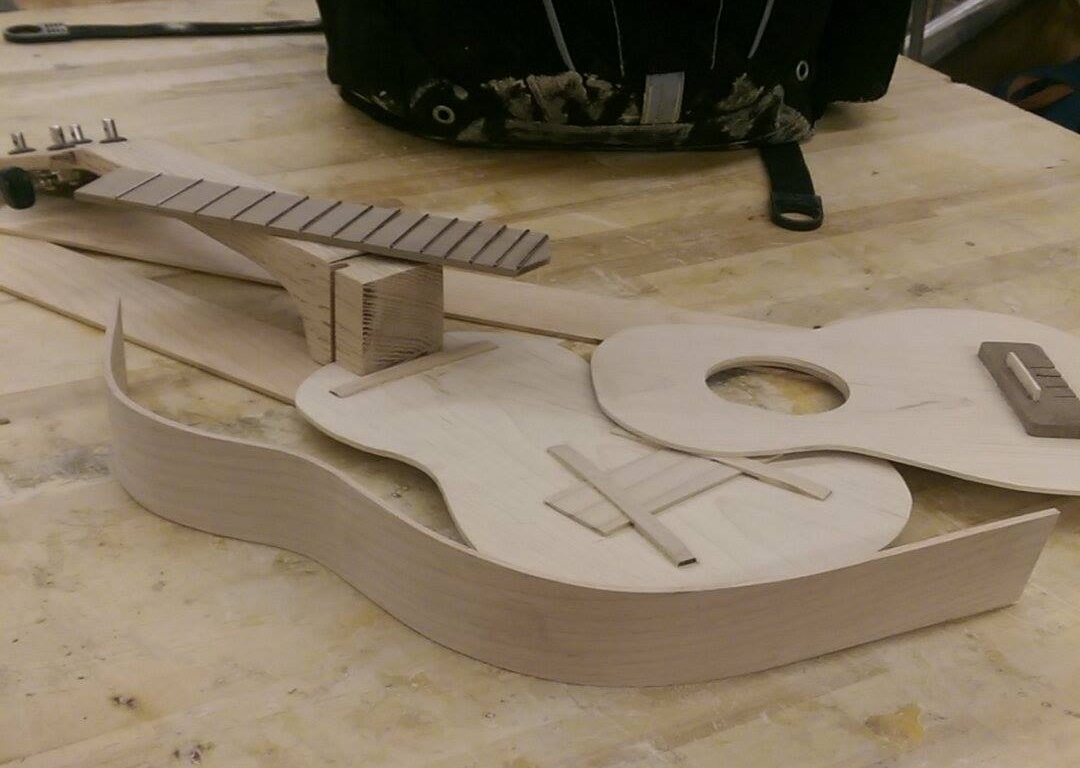
Calculating Fret Distances
For the ukulele to play correctly, each fret had to be placed with precise spacing. I calculated the positions based on the scale length—the distance from the nut to the bridge.
Steam Shaping the Body
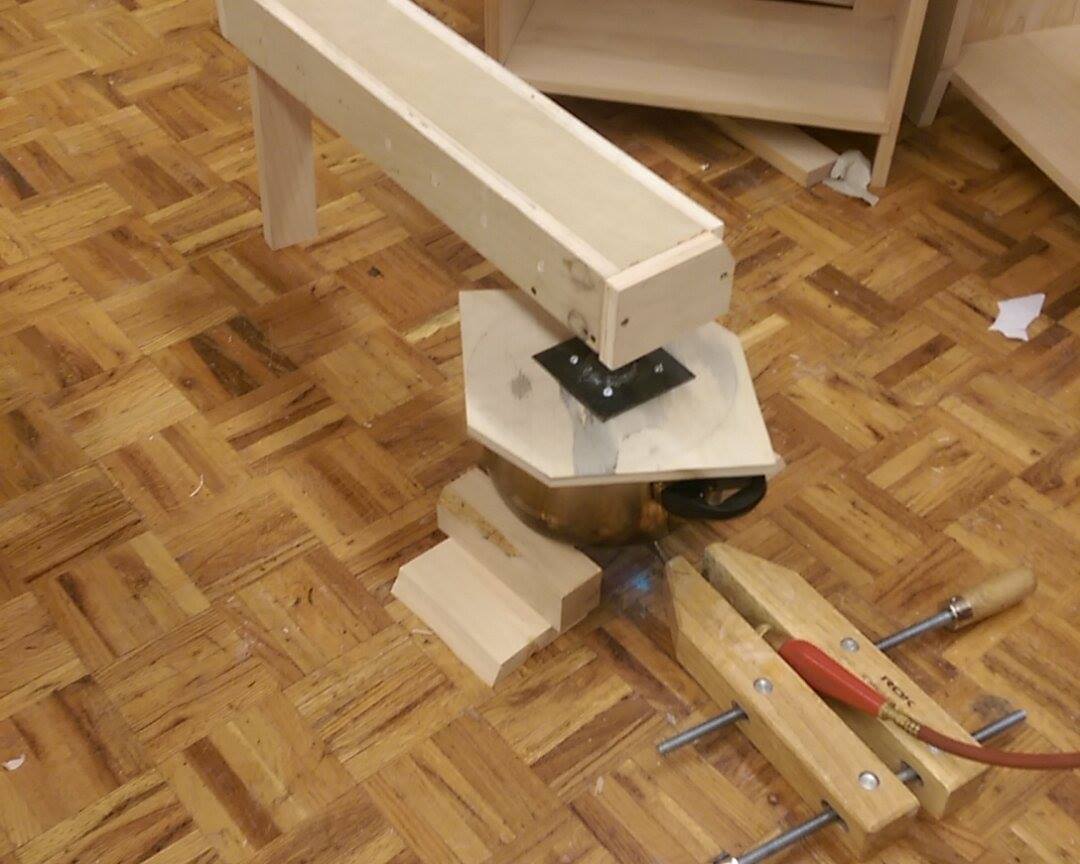 One of the hardest steps is shaping the ukulele’s curved body. Tight bends are not possible to achieve with dry wood, so after several failed attempts, I realized I needed to use green wood—wood that had dried naturally over time rather than being kiln-dried. Green wood retains enough moisture and flexibility for bending without splitting.
I constructed a simple steam box using a pot, some tubing, and a sealed chamber. The goal was to soften the wood fibers through steam, making the material pliable enough to curve without breaking. Once the wood was adequately steamed, I placed it in a mold and slowly tightened a wood clamp, gradually forming the desired shape.
To account for spring-back—when the wood slightly reverts after being clamped—I over-bent the wood, allowing it to settle into the proper curve once released. Rushing the bend could result in cracks.
Assembly
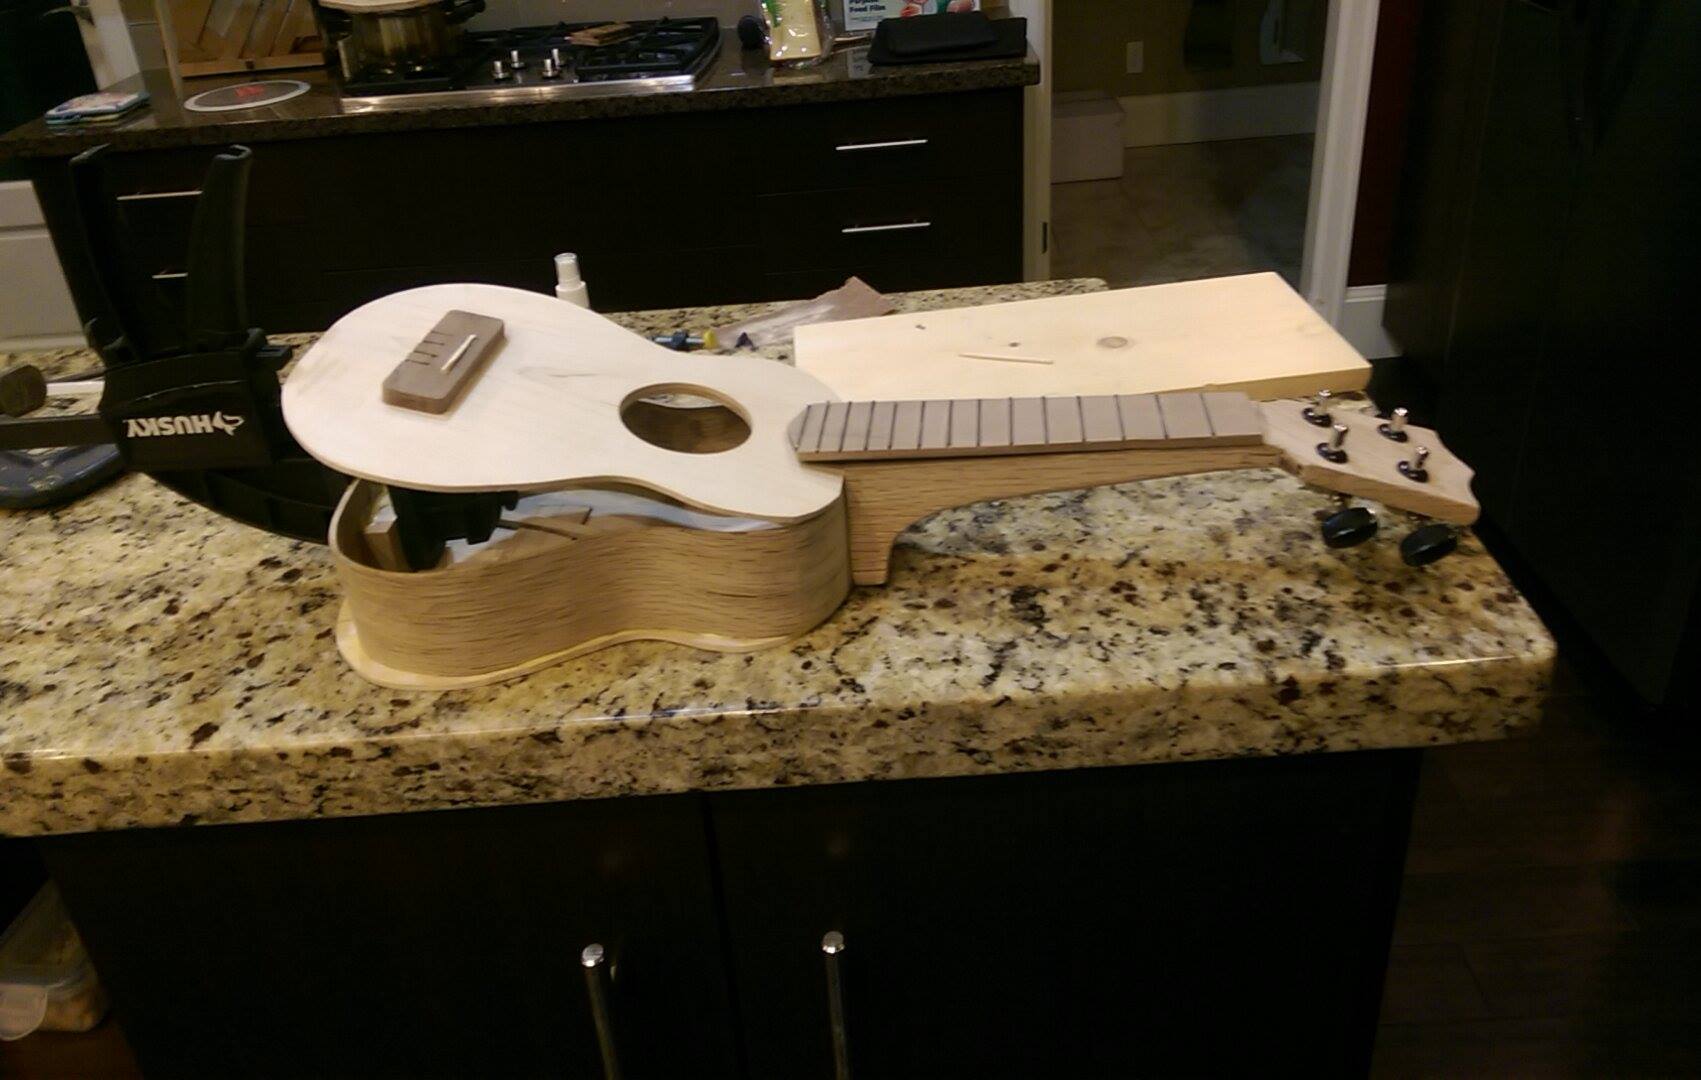 I glued the parts together to ensure the neck aligned for proper tension. I ordered strings and tuners online and completed the build with some final sanding and adjustments.