Fusion for cheap
Overview of a Fusor
In simple terms, a fusor uses an electrostatic field to accelerate ions (in this case, deuterium) toward a central point where they collide and fuse. The setup requires a high vacuum, high voltage, and a source of deuterium gas. The vacuum reduces collisions with background particles, allowing the ions to reach sufficient energy for fusion. High voltage is applied to create the electrostatic field that accelerates the ions with enough energy for the nucleus to fuse. Deuterium typically acts as the fuel for these fusion reactions.
openfusor.net
I decided to build an electrostatic fusion reactor, also known as a fusor, in my New York City apartment. I started with extensive research, relying heavily on resources from other amateur builders. One key resource was the forum fusor.net, which is filled with information but buried under thousands of disconnected threads. To streamline my research, I scraped the entire forum, organized the information into a retrieval-augmented generation (RAG) database, and built a chatbot that could quickly pull up and condense relevant details. The chatbot is public at openfusor.com.

Vacuum Design
Vacuum Chamber
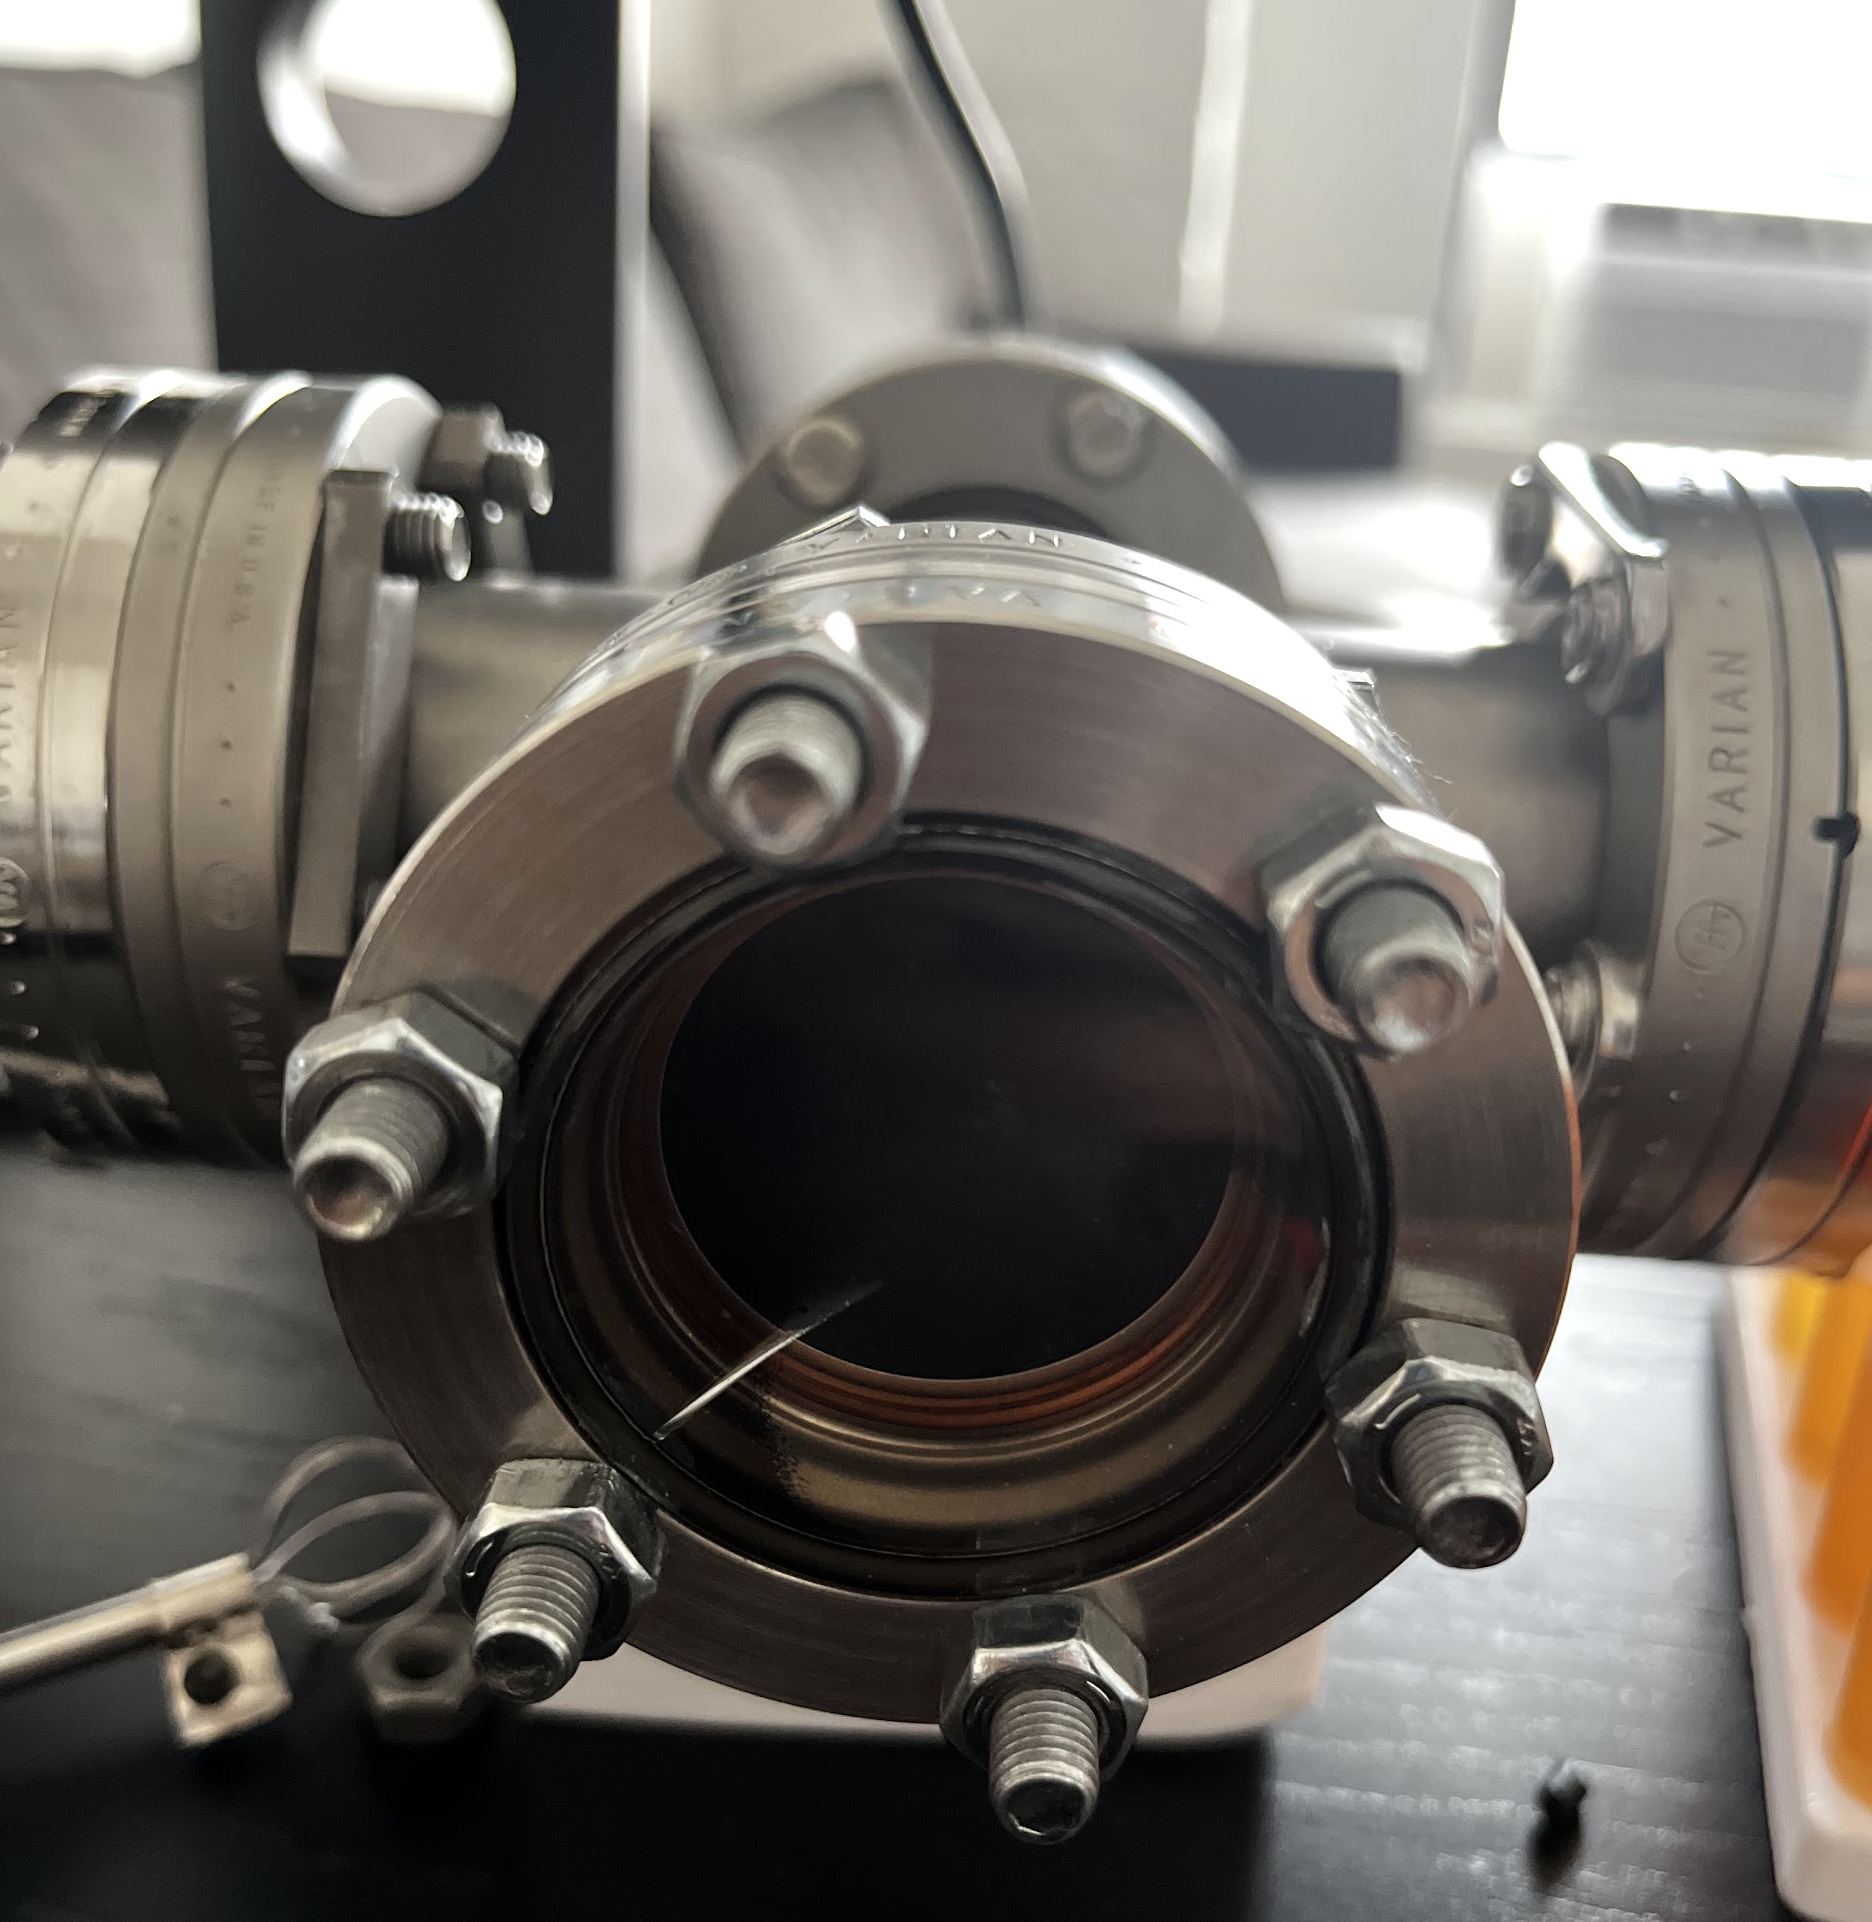
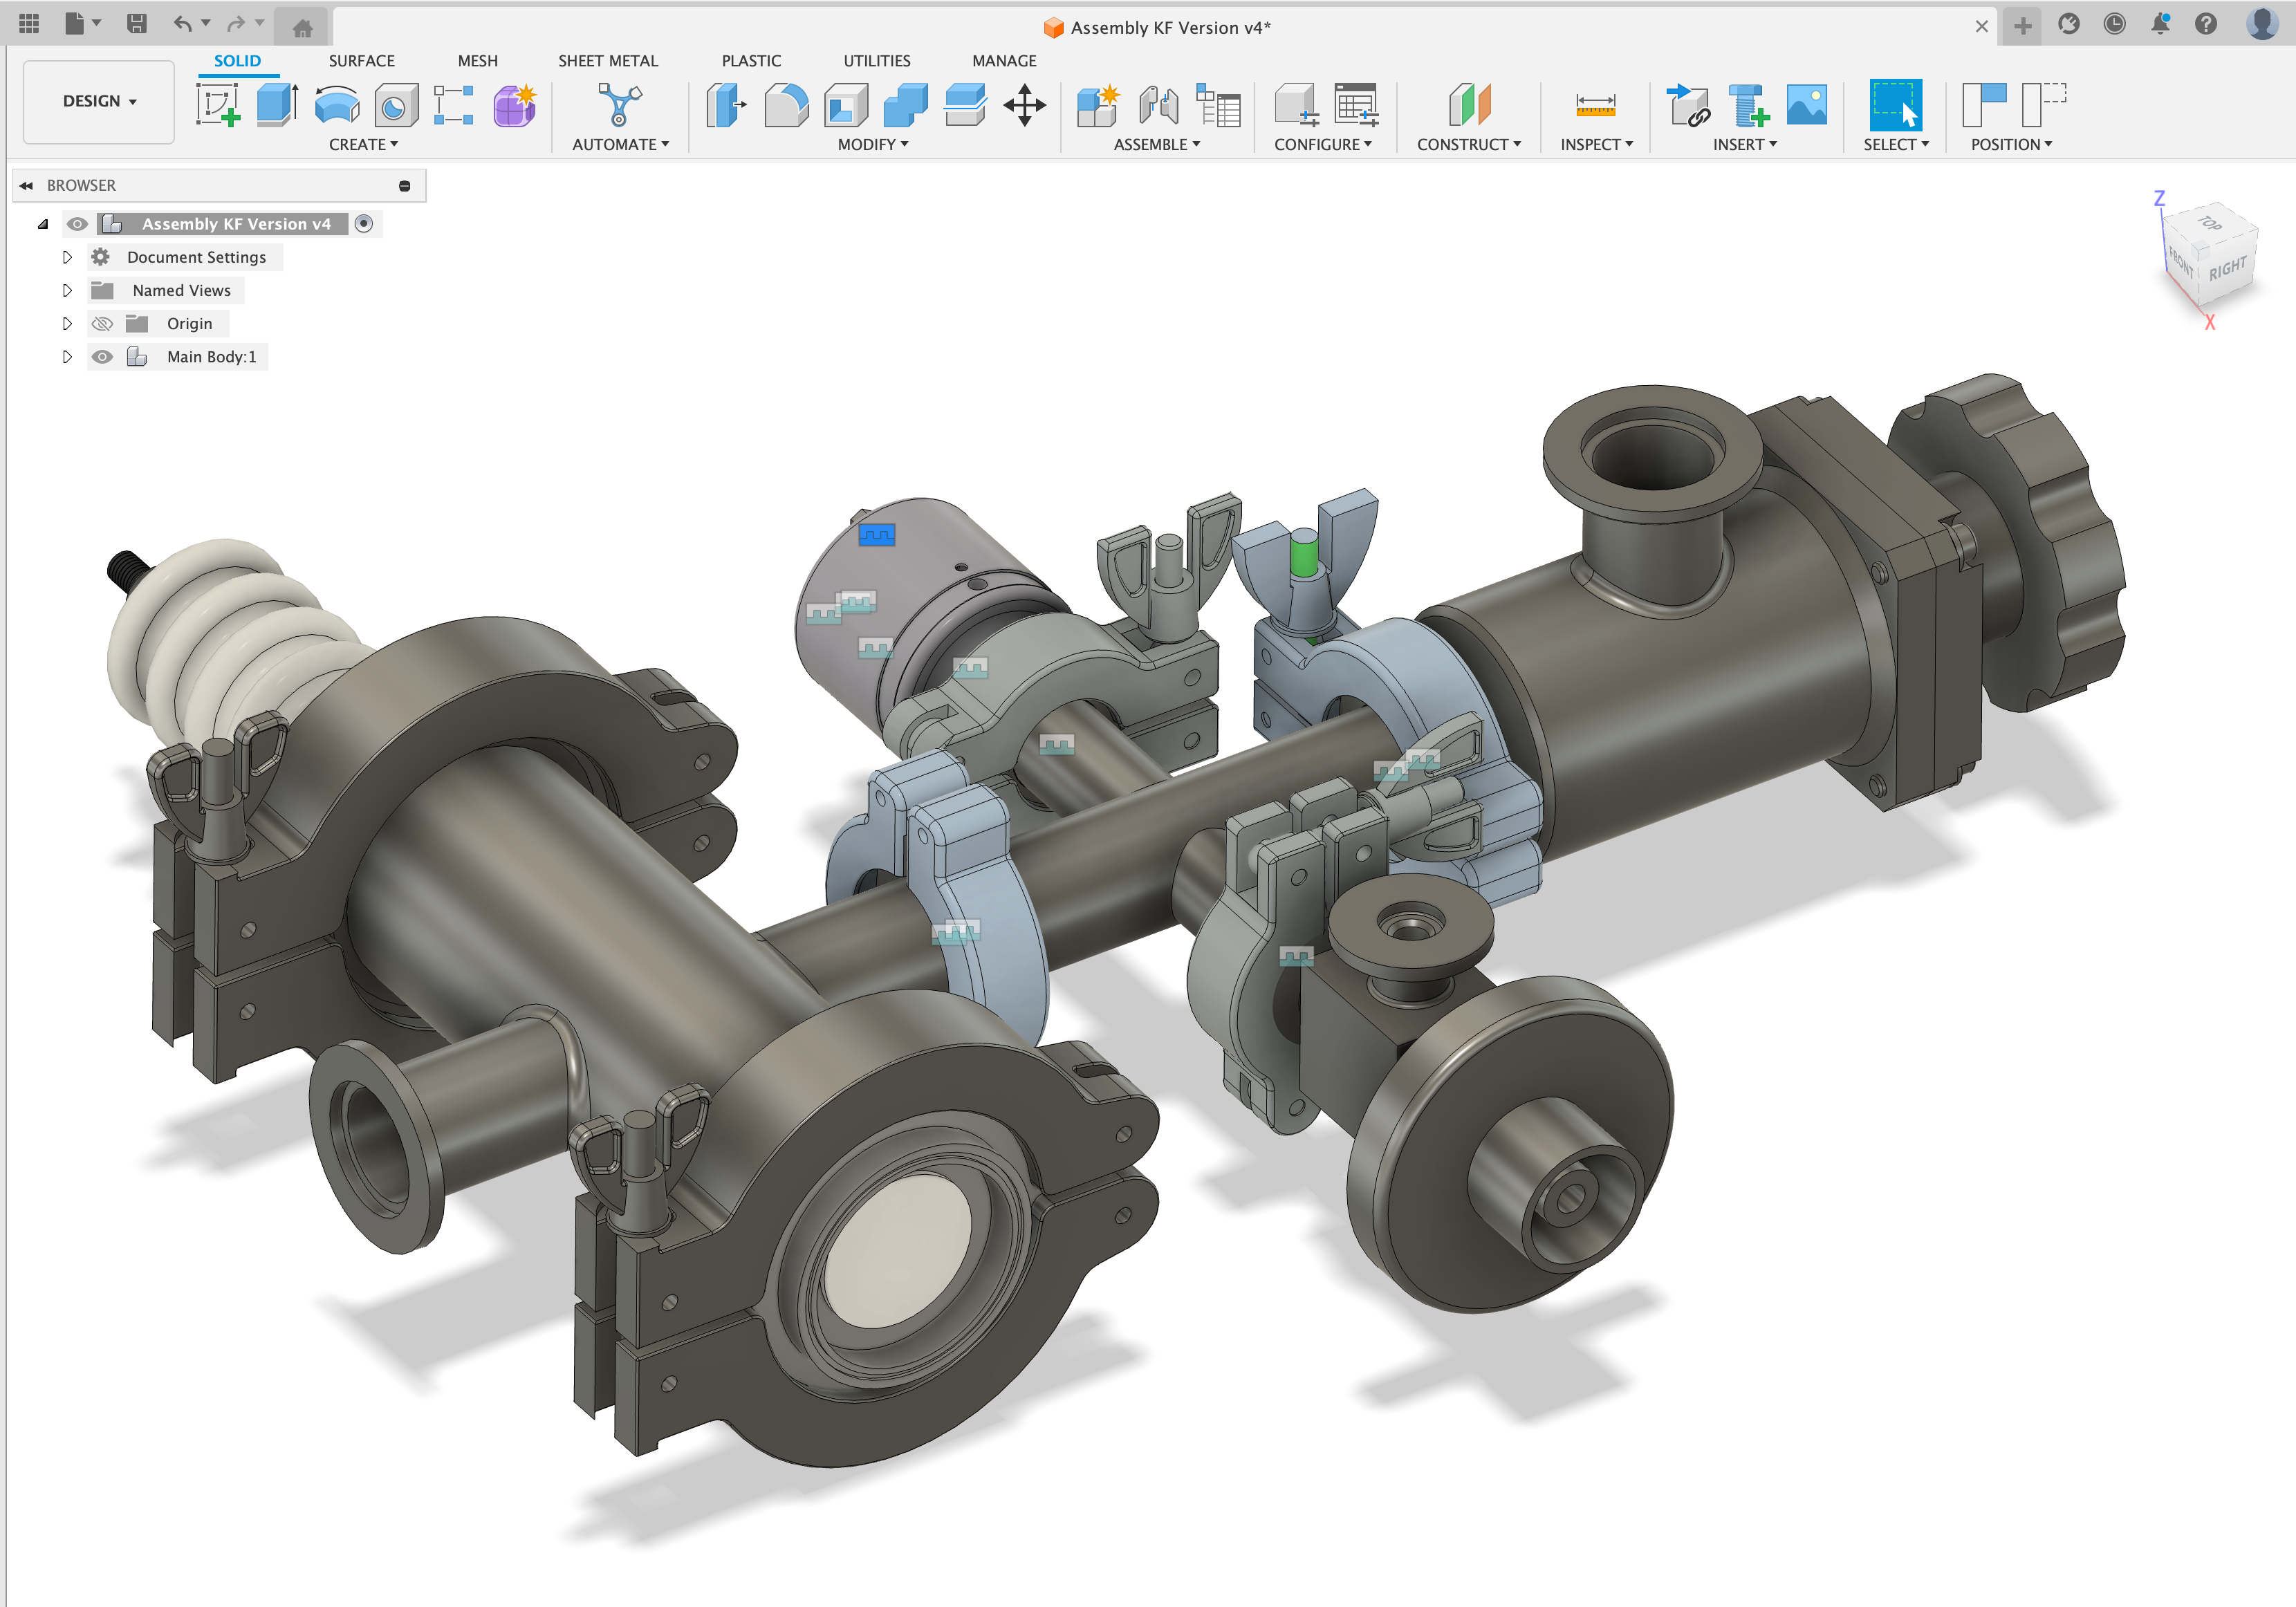
For the vacuum system, I chose to use KF vacuum fittings since they are the most affordable option while still being able to achieve the required vacuum levels (dependent on your design: ~10-6–10-8 torr.) Many designs on the internet use acrylic as their main reaction chamber. It is not possible to get down to the required vacuum levels using acrylic, most of those builds are demonstration fusors and are not generating neutrons. I'd recommend buying used vacuum fittings off of Ebay.
Vacuum Pumps
I sourced a rotary vane roughing pump from AllSurplus.com for extremely cheap, and later found a turbomolecular pump on eBay. The turbomolecular pumps the vacuum to ~10-7 torr but requires a roughing pump, to pull the vacuum to ~10-3 torr before it can be operated.
Vacuum Gauge
To measure the vacuum, I used an MKS 901P gauge.
High Voltage Power Feedthrough
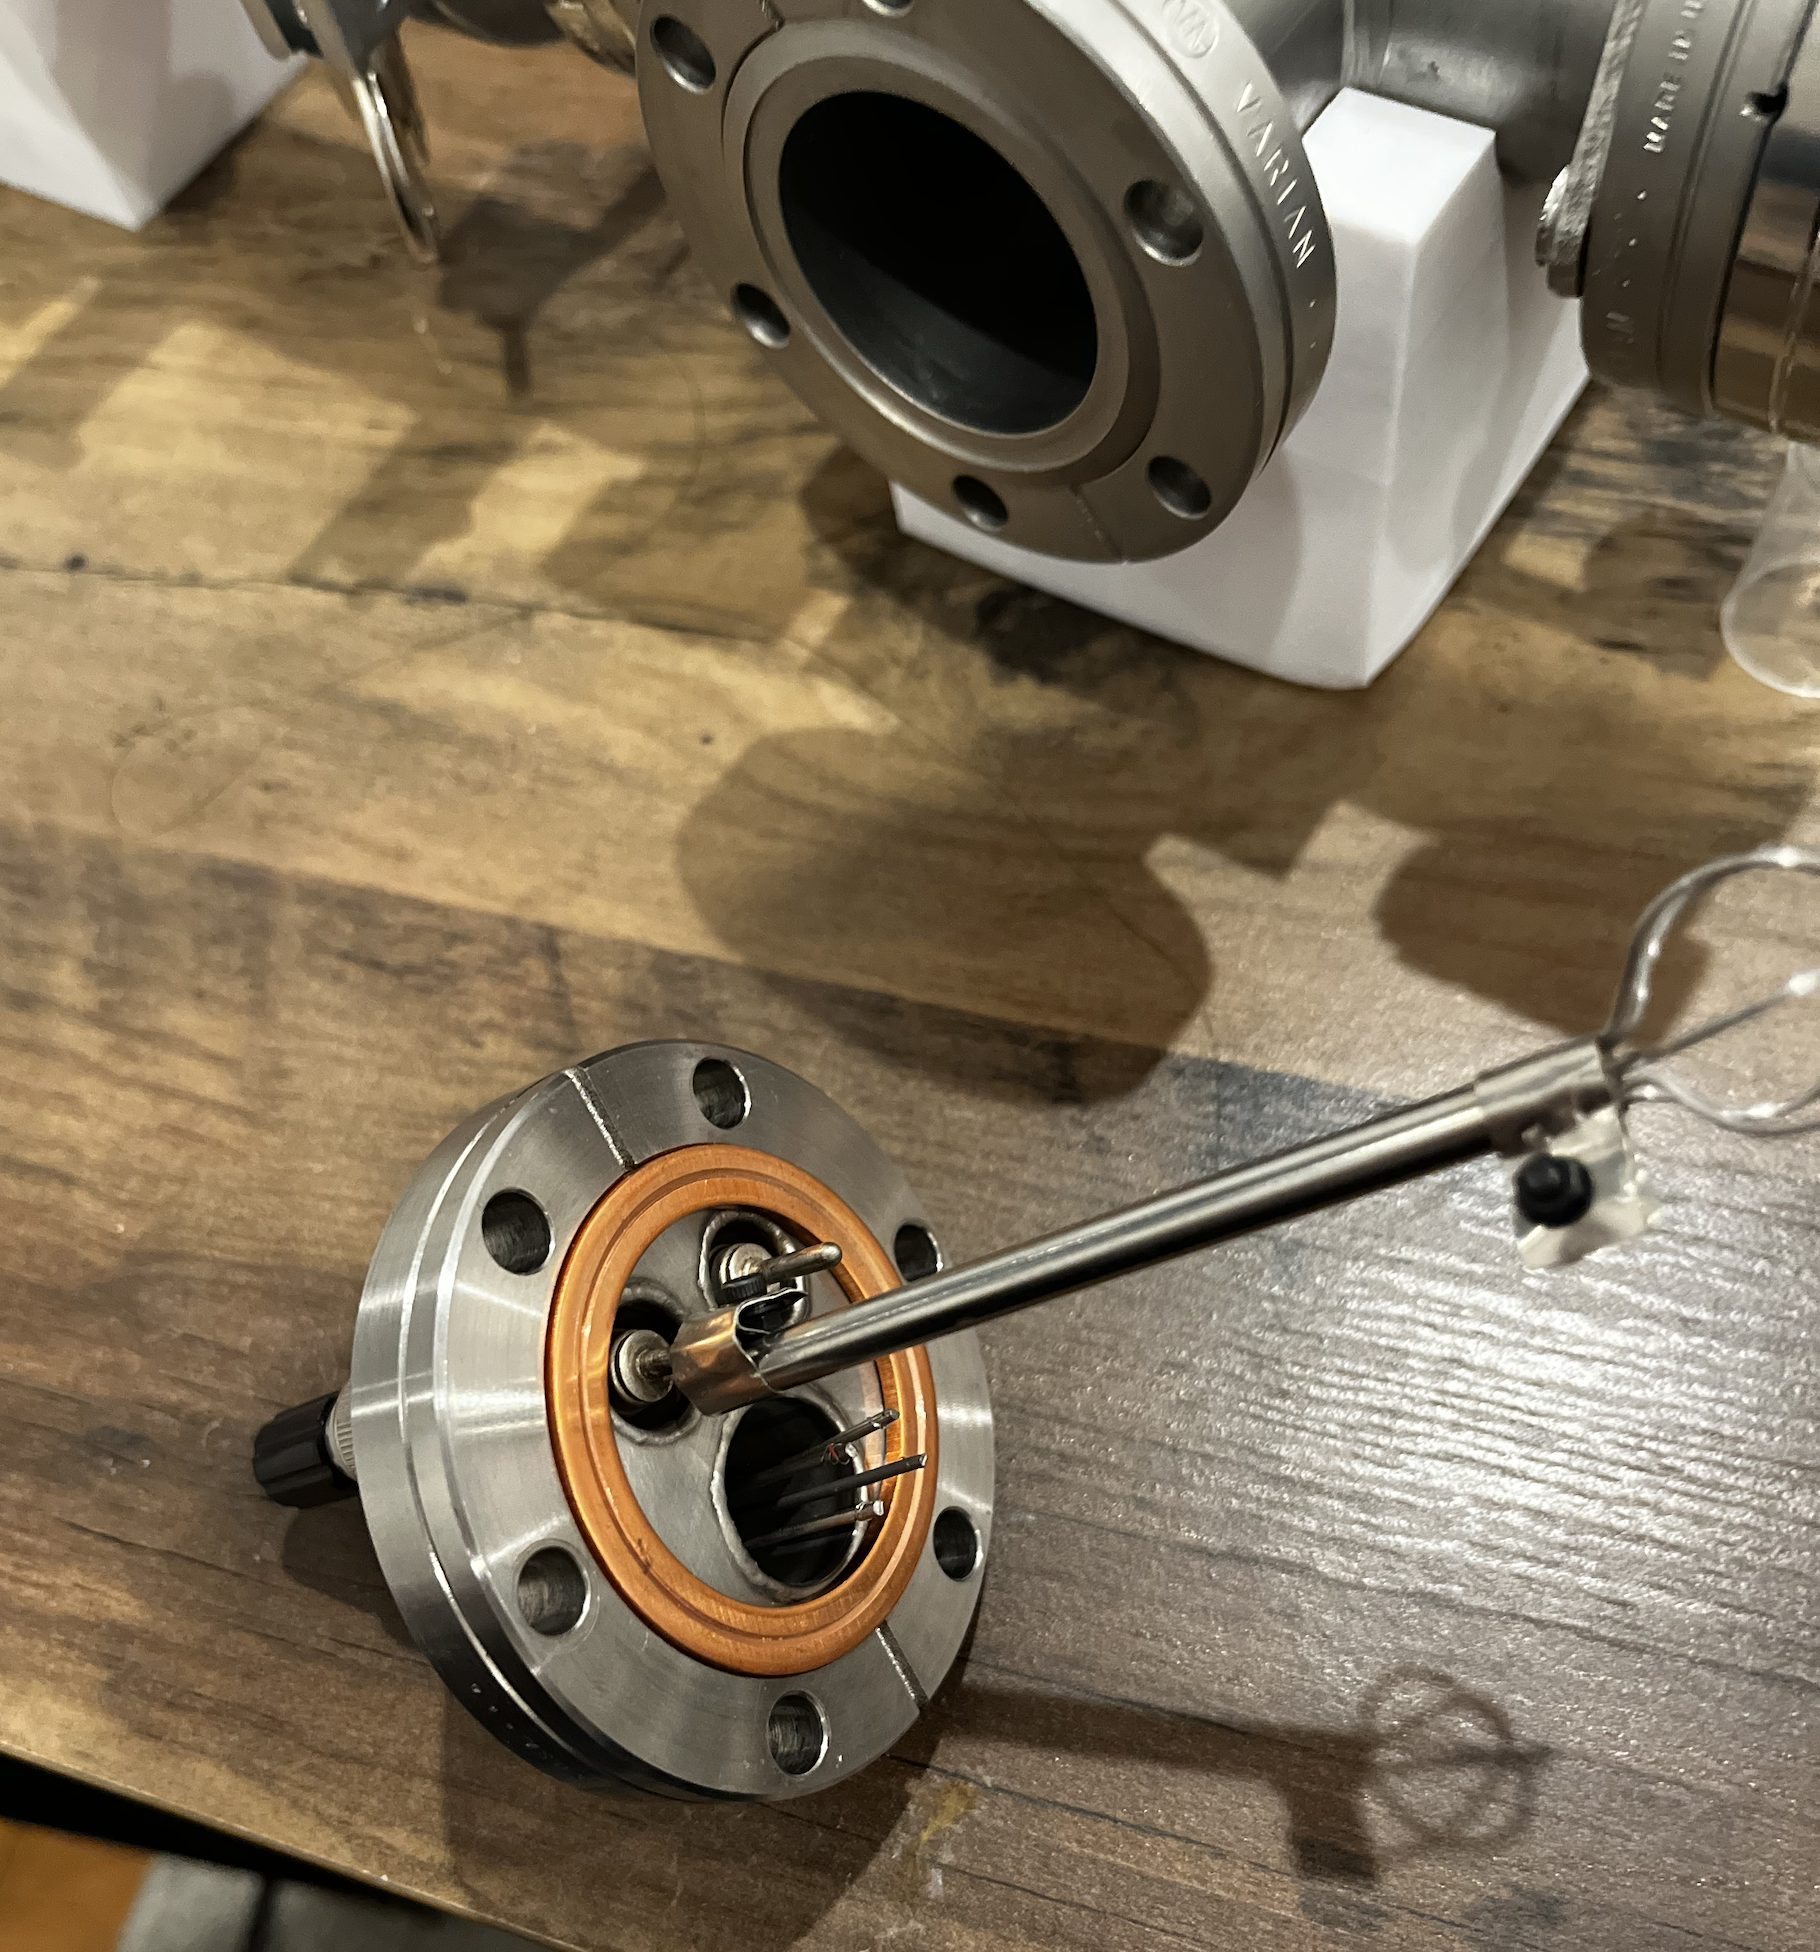
I bought a 30kV high voltage feedthrough to provide power into the system, while maintaining the vacuum.
Internal Grid
The internal grid was made using nichrome wires which can withstand extremely high temperatures. Quartz tubing should be used to cover the feedthrough lead to prevent plasma from being produced at the leads.
High Voltage Power Supply
Building the high voltage power supply was another critical step. I built out a -30kV voltage power supply using manually spun transformers, a voltage tripler, a variac, and high voltage rectifiers. However, it needed to be operated under mineral oil to prevent sparking. It was messy and I realized I really didn't like working with oily components so I just decided to buy a electrostatic high voltage power supply on Ebay.
One thing to note is that the high voltage supply I bought was a positive power supply. In a fusor, the center grid needs to be negatively charged compared to the outside chamber. This is what accelerates the positively charged nucleus into the center. Therefore, it's a lot safer to ground the outside and to have a high negative voltage connected to the internal grid. However, I had a positive power supply, so if you decide to follow my steps, be absolutely sure not to touch the outside of your chamber or you'll die.
Generating Deuterium Gas
Instead of purchasing pure deuterium gas, I opted to generate my own from heavy water as D2O was significantly cheaper to buy. I had leftover proton exchange membranes from a previous project involving microbial fuel cells, so I used those to electrolyze heavy water into deuterium gas. This approach was both cost-effective and allowed me to repurpose materials I was already familiar with.

[To be continued…]